Attention
August 2023 update: osu! Wineskins for macOS, osu!macOS Agent, and this osu!mac documentation website is no longer officially supported or maintained. Official support will no longer be provided by the authors of these respective projects on the osu! forums. You can read more information about this change from Technocoder and aidswidjaja. Thank you for everything.
Importing beatmaps and skins
Note
If you’re new to osu! and don’t know how all this beatmap and skin stuff work:
Note
osu!macOS Agent can automatically move beatmaps and skins from your Downloads folder. Just make sure to enable the checkboxes inside osu!macOS Agent settings. More information available below.
Importing beatmaps and skins
Importing beatmaps into osu! is quite easy, and there’s a number of ways you can get this to work with your osu! Wineskin.
Using osu!macOS Agent
You can have beatmaps automatically moved from your Downloads folder to osu!, with the help of Technocoder’s osu!macOS Agent program. To enable this:
Open osu!macOS Agent
In the General tab, locate the Location: field. Make sure this points to your osu! install (e.g
/Users/Adrian/Desktop/osu!.app)Enable the following checkboxes
Automatically move beatmaps from Downloads
Automatically move skins from Downloads
You can also enable
Automatically open replays from Downloads
Leave osu!macOS Agent running. The next time you download a beatmap from the osu! website, it should automatically move to your osu! wrapper. Then just hit F5 (beatmaps) or Ctrl-Alt-Shift-S (skins) to refresh.
Drag and drop
You might also be able to drag and drop beatmaps and skins into osu! directly. In my personal experience this only works with Technocoder’s Wineskin with macOS Catalina 10.15 support.
If osu! is full screen, you can use Mission Control (F4 key) to switch between windows.
Click to import
Note
Users have reported issues with this on newer wrappers such as Technocoder’s Wineskin with macOS Catalina 10.15 support, see community/forums/posts/7805376 and Gcenx/WineskinServer/issues/47. In the meantime, use an alternative import method.
You can set up osu! to automatically open and import a beatmap or skin when you click on it in your Downloads folder or web browser.
Download a random osu beatmap or skin (and get the osz file)
Right click on osu!.app
Click Show Package Contents
Navigate to
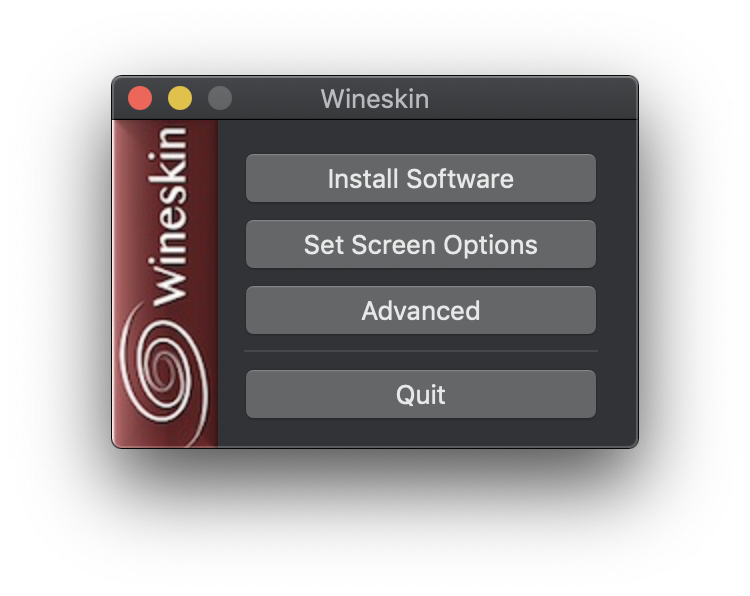
drive_c/osu!/Songsand drag & drop youroszoroskbeatmap into thereGo back a few folders until you reach Wineskin.app, and click to pen it!
Click Advanced. You should see a screen like the one below
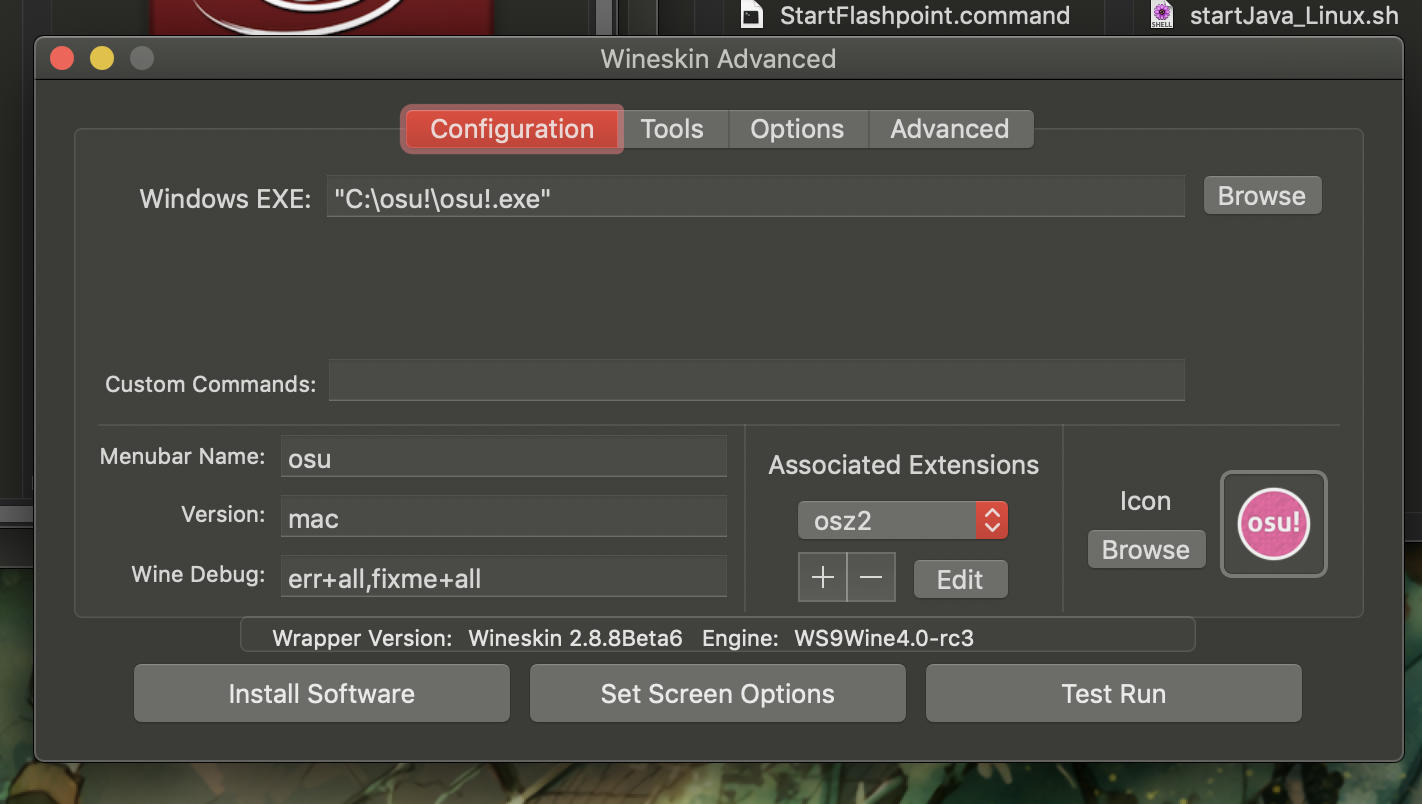
Note the Associated Extensions section. If the osz2, osr, osz and osu extensions aren’t there, add them using the + button.
To verify that this has all been set up correctly:
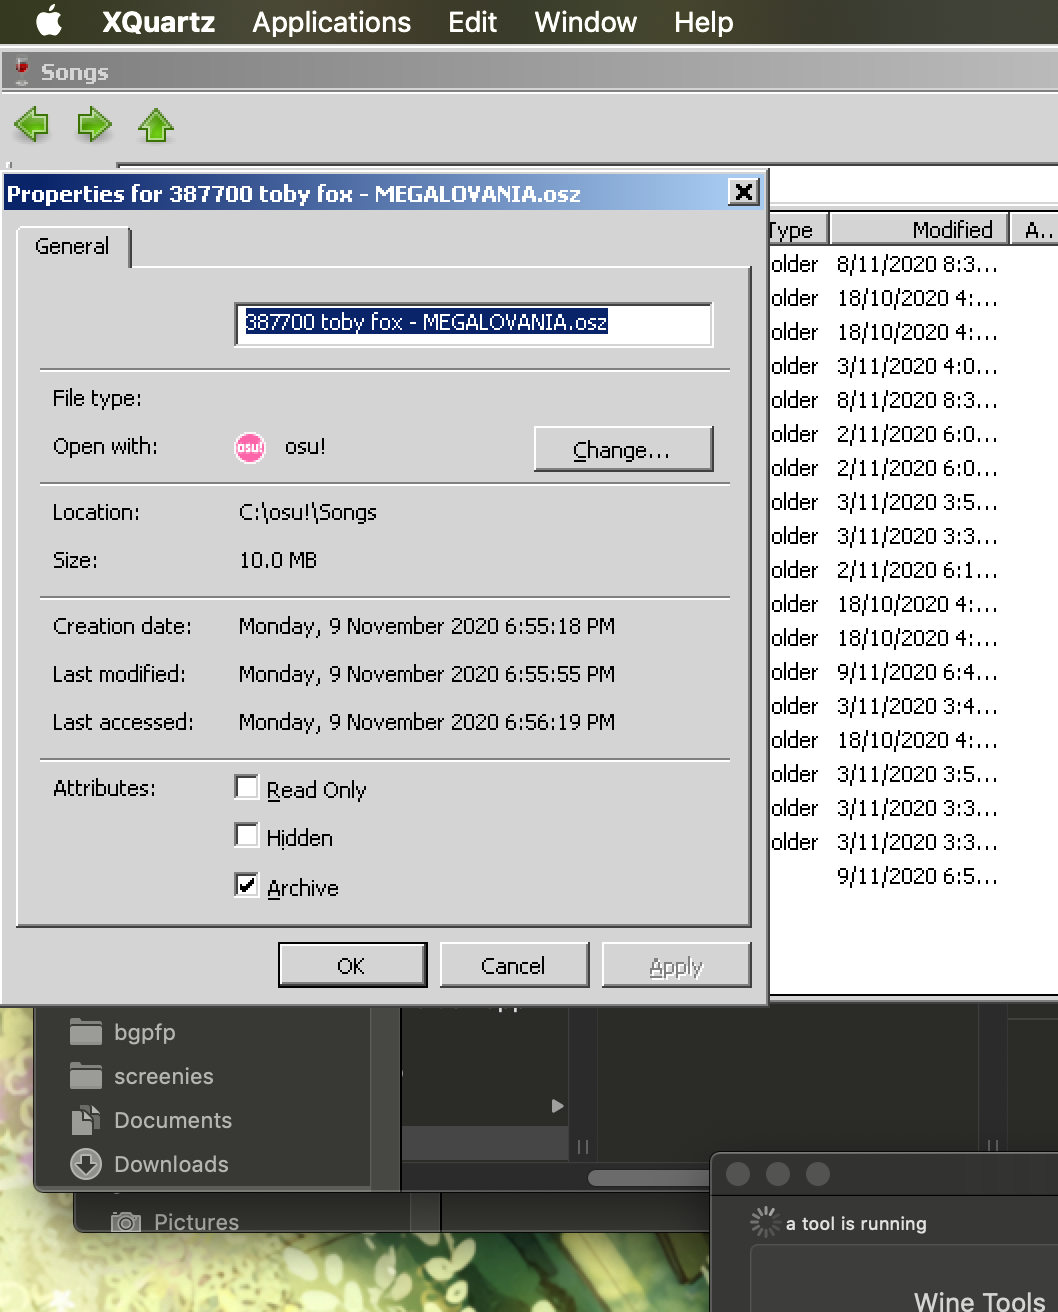
Click Tools, then click Command Line (cmd). A console-like should open (it takes a while tho)
Type
explorer.exeNavigate to
My Computer\osu!\Songsin the window that appears and locate the osz beatmap you just droppedRight click on the file, click Properties and verify it worked. It should look like the image below.
Note
This method tends to be more unreliable than the others listed and you may experience varying degrees of success.
Manual import
To manually import a beatmap into osu!, follow the following instructions:
Find your
SongsdirectoryLocate where
osu!.app(your Wineskin) is installedRight click on it and select
Show Package ContentsYou should now see three files/folders:
Contents,drive_candWineskin. Clickdrive_c.From here, click
osu!.From here, locate
Songs
Tip
You can create an alias or shortcut pointed to your Songs directory, in somewhere handy like your Desktop. Then you can quickly access the folder whenever you want to drop beatmaps in.
To create an alias, click on the Songs folder, then go to File > Make Alias - then put this alias somewhere where you can easly access it.
Find a beatmap on osu.ppy.sh. For this example, we’ll use Ryofuka’s crossing field.
Just like you would normally, click the Download button to download the beatmap.
You should now have a
.oszfile in your Downloads file. Drag and drop this file into theSongsdirectory we located before.
Tip
To avoid potential import issues, remove any non-alphabetical characters (numbers and hyphens are fine)
Note
Yep, my beatmap folder is very empty (but yours won’t be! Unless it is, of course..)
If you don’t have osu! open already, open it now. Then in-game, press
F5
Note
Unless you have function keys enabled, you may need to press the Fn button at the same time.
Use F1, F2, etc. as standard function keys
Locate where
osu!.appis installedRight click on it and select Show Package Contents
You should now see three files/folders:
Contents,drive_candWineskin. ClickWineskinA window like the one below should pop up. Click Advanced
Click the Options tab
Select Use F1, F2, etc. as standard function keys
Tip
You can do all of this while leaving osu! running open in the background!
A note about importing skins
Importing skins is largely the same process, except instead of the Songs directory, use the Skins directory, and to reload osu! use Ctrl-Alt-Shift-S instead of F5.
You can then select your skin as normal from the osu! in-game settings menu.
Note
Treat this as if you were working on a Windows system. If the skin is compressed, you’ll probably need to uncompress it. You can use something like The Unarchiver or even your in-built Archive Utility to do this (though Archive Utility might not have so much fun with .rar or .7zip files)
See the osu! knowledge base for more info.